Real-time alert information can be passed to a designated mailbox via the email server, and so administrators can understand and process alarm in a timely manner, to quickly locate and solve problems.
Before using the email notification function, administrators should set the email notification server first by clicking menu Tools > Options, and then choose Settings of Email Notification Server. Then you would see a setting list of email notification server as the picture below.
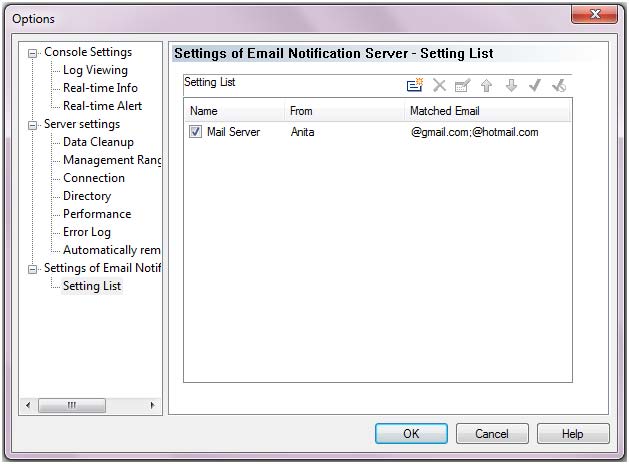
There are six buttons on the upper right corner of the list.
![]() : Add.
: Add.
Click this button you open a window to create a new mail server as the picture below.
![]() : Delete.
: Delete.
Click this button to delete specific mail server.
![]() : Modify
: Modify
View and modify specific mail notification server.
![]() : Sort up.
: Sort up.
Move up the currently selected mail server. Default setting would maintain at the bottom of the list and cannot be moved.
![]() : Sort down.
: Sort down.
Move down the currently selected server. Default setting would maintain at the bottom of the list and cannot be moved.
![]() : Make Default Setting
: Make Default Setting
Make the currently selected mail server to be the default one. Once successfully, color of the default mail server would turn blue and the Matched Email would change to <All> automatically.
![]() : Cancle default setting
: Cancle default setting
Cancel default setting of specific mail server.
Create a new mail server:
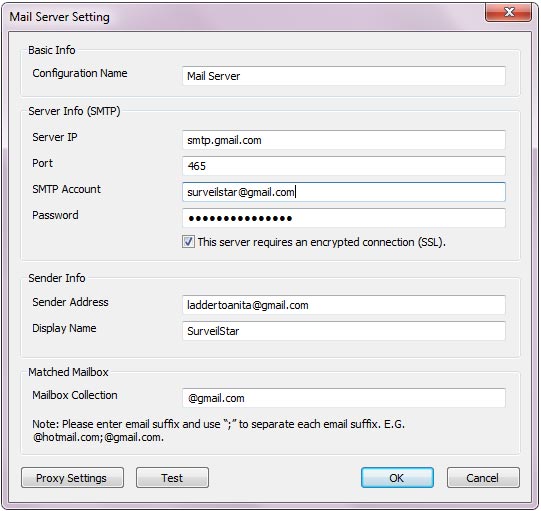
Configuration Name: Give a name to the email notification server. The console will add a default name automatically and administrators can customize it.
Server IP: Mail SMTP server address.
Port: Port of SMTP. The default one is 25.
| Server IP | Port | |
| Gmail | smtp.gmail.com | 465 (or 587) |
| Hotmail / Live | smtp.live.com | 25 (or 587) |
| Yahoo | smtp.mail.yahol.com | 465 (or 587) |
SMTP Account: Your full email address.
Password: Your mail password.
Sender Address: Address of the sender mailbox to send alert messages.
Display Name: Display name of the sender.
Mailbox Collection: Mailbox collection used to receive alert messages. Separated with ";".
Please note that:
From top to bottom match the mail server settings, and if any rule matches, SurveilStar would send mail to the specified mailbox.
View Hardware Changes
Click the menu Tools > Email Notification Settings, administrators can view, add and modify the settings.
![]() : Add.
: Add.
Click this button to create a new email notification setting.
![]() : Delete.
: Delete.
Click this button to delete specific email notification setting.
Create a new email notification setting:
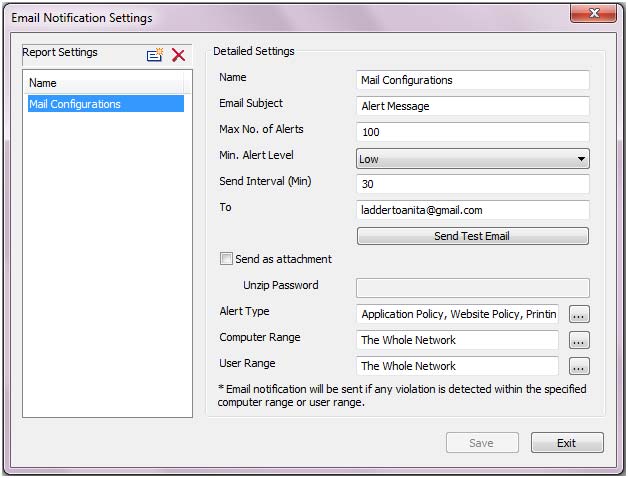
Name: Give a name to the email notification setting. The console will add a default name automatically and administrators can customize it.
Email Subject: Give subject to the report sending mails.
Max No. of Alerts: Each mail contains a maximum number of alert information. Alert Exceeds the number will be sent in next mail. The default value is 100.
Min Alert Level: Choose one of the three alert level: Low, High and Critical.
Send Interval (Min): Specify the time interval for sending mails. The default value is 30(Min).
To: Email address to receive the alert notification.
Send Test Email: Test the mailbox above can receive alert notification mail or not.
Send as attachment: Check this to send notification mails as attachment. If not, mails will send as text.
Unzip Password: Send a zip file as an attachment and the file can unzip it with the password.
Alert Type: Select alert type from the alert type list including Application Policy, Website Policy, and Printing Policy and so on.
Computer Range: Specify computer range of email notification.
User Range: Specify user range.
| Re-logon and Change Password | Back to Index | Accounts |