By setting the watermark and the watermark content type, you can print out the file to bring custom watermarks with SurveilStar. It does achieve to protect document copyright. It is also the best choice if you would like to print documents with backgrounds, borders, and text effects. The watermark only show while printing out. You can add two types of watermarks to a printing document: a picture or text.
In SurveilStar Console, click menu 【Advanced > Watermark Settings】, click Add button to create a watermark policy. Then you will see Property panel on the right as the picture below. In the following example, you can see that text watermark will add to all printing documents.
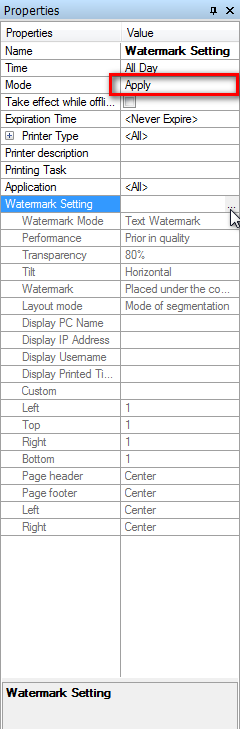
| Properties | Value |
| Name | Give your policy a name like Watermark Setting. |
| Time | Set effective time for your watermark policy. |
| Mode | Select policy execution mode. Apply and Disable modes are available. Apply: Add watermark. Disable: Do not add watermark. |
| Take effect while offline | Check this option if you want the policy to be effective only when the computers are offline. |
| Expiration Time | Check and apply this option to set expiring time for the policy. |
| Printer Type | All four printer types can be selected: local printer, shared printer, network printer and virtual printer. Check or choose all by letting them to be blank. |
| Printer description | Name the selected printer. |
| Printing Task | Name the printing task. |
| Application | Specify the application used for printing out. |
| Watermark Setting: Watermark content and display. Only enabled when you set 【Mode > Apply】. | |
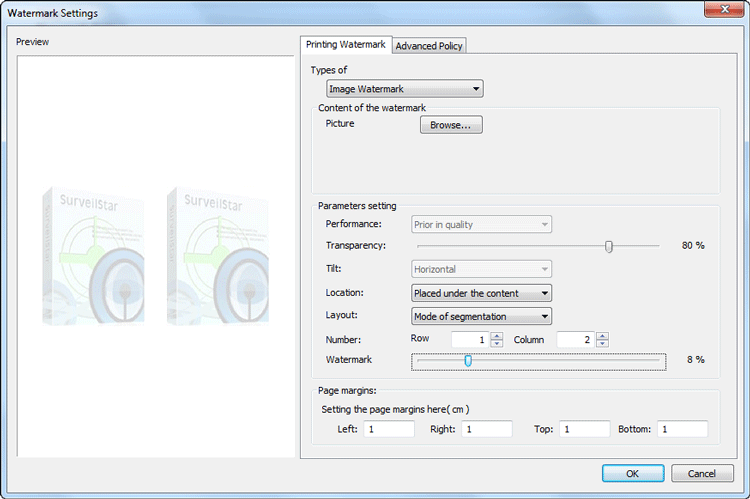
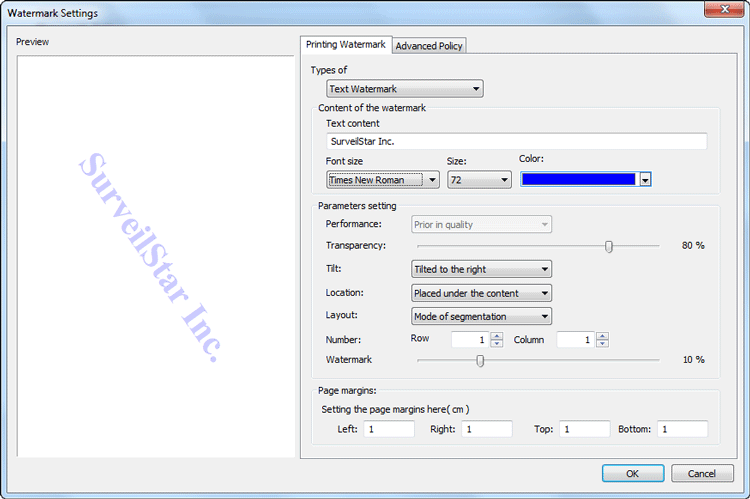
| Watermark Types | Image Watermark or Text Watermark. Image Watermark: Simply choose a picture from PC. Text Watermark: Set watermark text, font, size and color. |
| Parameters settings | Performace: Prior in quality (by default) or Prior in speed. Only enabled when you set the 【Location】 to be On the top of the content. |
| Transparency: watermark transparency, support 0-100%, default is 80%. | |
| Tilt: Horizontal, Tilted to the left or Tilted to the right. | |
| Location: Watermark position relative to the content of the document, you can choose Placed under the content or On the top of the content. | |
| Layout mode: Mode of segmentation or Area mode to deside the watermark number. Default is Mode of segmentation. Mode of segmentation: Set number of watermarks, default number is 3x3; Area mode: Set size of watermark. default size is 3cm x 3cm. |
|
| Watermark margins: margins between watermark. Mode of segmentation: Watermark margin is in percentage display. Area mode: Display margin left, right, top and buttom. |
|
| Page margins | Page margins setting when printing. |
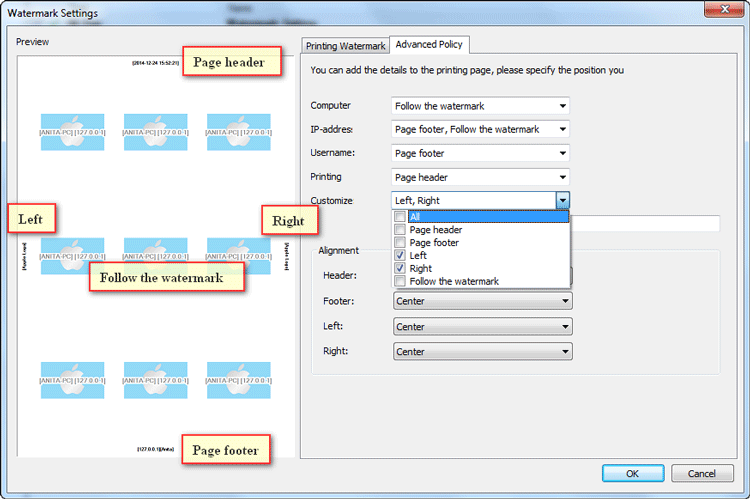
| Advanced Settings | Advanced Settings allows you to print some additional information, such as: computer name, IP Address, user name, printing time and customize the information. Each additional information could display in: header, footer, left, right and follows the watermark. |
Image Watermark Example
Text Watermark Example
Advanced Policy Example
Please Note:
Only if you set 【Mode > Apply】 above which means that you would like to add watermark while printing, you can make custom watermark settings to deside the content and display.
This is an example which can help you better understand Watermark Policy.
The requirement is that IT manager would like to add text watermark to all printing documents except Ann's computer. To achieve this, a set of strategies is a good choice. For example:
1. Choose 【The Whole Network】 from the left computer list, click menu 【Advanced > Watermark Settings】 to create a watermark policy.
2. On the right watermark policy setting panel, slect 【Mode > Apply】 to all types of printer. Then custom the text watermark content and display. Save the policy.
3. Choose Ann's computer from the left computer list, create another watermark policy, and set【Mode > Disable】. Save the policy.
| Print Policy (Advanced) | Back to Index | Screen Snapshot Monitoring (Real-time) |